Wow! Has it really been almost a month since my last post? I do apologize for my lack in posting, we are currently in the middle of moving.
I have been busy making things and planning out cool stuff to make, but the process of packing and cooking and cleaning and preparing for our move has sort of pushed writing on here back a few priority spots.
So hopefully after we have fully moved into our new house I will be able to write on here more! Hope you all are having a wonderful week!
Wednesday, June 29, 2011


Sunday, June 5, 2011
DIY Chalkboard "to-do" List
I am a list-maker.
I make tons of lists for tons of various things. But they're always on little scraps of paper that get lost. So all of the things that I plan on doing or making wind up not getting done. I'm seriously unorganized! So maybe having a jumbo chalkboard that won't get lost in the shuffle of my daily occurrences will help out a bit....That and dear old hubby can add stuff he wants me to do too.

What you need:
Cookie Sheet
Chalkboard contact paper
Krylon Clear Spray (Satin finish)
Acrylic paints (I used “Caribbean” and “White” from Apple Barrel) though if I had it, I would have used spray paint and primer instead.
Paintbrush (preferably foam, so you don’t get the loose hairs that I did- life lessons!)
Chipboard letters
Hot Glue Gun & Glue
Embellishments (not pictured)

I have had this project on my “to-do” list for a couple months now, but I kept putting it off. I started it by putting the contact paper on first, but now that I know better, I’d wait until AFTER the painting is done and clear coat has gone on before I added it. Oh, well.
Primer the back of the cookie sheet in white and let dry. Make sure to get all the cracks and crevices and around the edges!

While the white is drying, since I used already decorated chipboard letters (from K&Co), I painted over them (a few times) with the Caribbean blue. But if you’re using naked chipboard I doubt you’ll have to recoat as many times as I did.

After the white is completely dry on your sheet, start adding on the blue. I had to do 3 coats to get it how I wanted it.

Now, if you waited to add the contact paper until after the paint was on, you wouldn’t have to do this next step, but I didn’t so I’ll show you anyways!
Tape off the contact paper with tape and an old brown paper bag to make sure that when you spray the clear coat on, it won’t get on it.

Take the cookie sheet and the chipboard letters (I decided to use glitter glue to put stripes on them as an after-thought) outside and spray on your clear coat. Let it dry for 2 hours.
Now, for those of you who learned from my mistake, measure out your contact paper to cover the bottom, remove the paper backing and press onto the cookie sheet. Mine is 11 ½ x 15 ½ . Make sure to get out all the wrinkles and bubbles (obviously I didn’t too good of a job on that!)
Use your hot glue gun to add the letters to the cookie sheet. Then add whatever other embellishments you have to it too. I made a fabric flower (I found an awesome tutorial here) and a ribbon flower, and then sewed the two together with a button, then hot glued it onto the top corner.

Then I hot glued some white ribbon around the edges (mostly to cover up my mistakes and lack of being a straight cutter!) and then hot glued buttons to the corners because I just can't leave well enough alone. *Hot tip: when pressing buttons into hot glue, make sure your finger isn't covering the holes...

Hopefully your cookie sheet has a hole in the top so you can thread some ribbon or wire through to hang. Mine doesn’t, so I had to have my hubby drill one for me. I just tied a knot, making sure to leave enough ribbon so I could tie a bow on the top. Then twisted some heavy wire around it and made a loop to hang.


Finished product! And the cool thing is that since it's made of metal, I can make cute magnets to attach little pieces of paper!
Hope you had fun making this project! Did you do something different? I’d love to see it!
Project Level: Time Consuming, but fun!
Saturday, June 4, 2011
Fully-Loaded Fried Rice

Being half-Japanese, we grew up eating a lot of Japanese dishes. When my dad cooked them, he would add his own spin on them, especially the fried rice. He kind of just pulled whatever leftovers there were in the fridge and threw them in the pan :) So here is my version of fried rice:
Ingredients:
1 1/2 cups uncooked white rice
4 slices bacon
3 hot links
a handful of chopped vidalia onion
1 cup frozen veggie mix (carrots, corn, peas)
soy sauce (we use the Kikoman Light brand to cut down on the salt)
3 eggs
Items you'll need:
Pot for the rice
Wok (or a deep pan if you don't own a wok)
Wooden spatula
Knife for cutting
Kitchen scissors (not necessary, but I find it's easier to cut up the bacon with them)
Cutting board
Measuring cup
Prep:
Cut bacon into small slices.
Chop up about 1/4 of the onion into small pieces (or leave them bigger if you prefer).
Cut the hot links into bite size pieces.
Cook the rice according to directions in the pot. While the rice is cooking, add the bacon into a hot wok (set on medium high at first, then turned down to medium while its cooking). Keep it covered, or you'll get splashed (that's the only thing I don't like about bacon)!


After the bacon is pretty much crisp, add the frozen veggies and mix them in to coat them with the bacon grease.

Cook for about 5 minutes or until the vegetables are no longer frozen. next, add the cooked rice and mix everything well. Let the rice sit in the mix for about 4 minutes to soak up the bacon grease (its important for the taste).
Pour a little soy sauce over it. A little bit does go a long way, trust me! Let it cook with the soy sauce for about 2 minutes then make a "well" in the middle of your wok...this is where you'll crack your eggs into.


Linked up to: Today's Creative Blog
Wednesday, June 1, 2011
Spring Circle Garland
A year ago I made a bunch of party decorations for a wonderful friend of mine. One of my favorite things had to have been the garlands. They were really easy to make and turned out super cute!

Things you need:
Colored cardstock (4 colors)
Circle cutter (I use my Martha Stewart one)
24 Star beads
yarn (a healthy length!)
Glue
Glitter glue (or just glitter)
Long needle
Cutting mat (mine is atrociously dirty, someday I’ll get around to cleaning it off a bit)

Using your circle cutter, cut out about 12- 2 ½ inch circles per color of cardstock.

Fold each circle in half.

Then glue four circles together, but try to avoid gluing in the center as much as possible because you’ll need your needle to slide through easily.

Do this until you have used all of your circles. You can do one, two, or four different colors per “ball” that you make. Mix it up and have fun! Once the glue is dry, thread your needle with the ribbon. Make a knot at one end (either a complete knot, or one with a loop on it if you will be hanging it from a nail or thumbtack) Thread one of the star beads and glue in place.
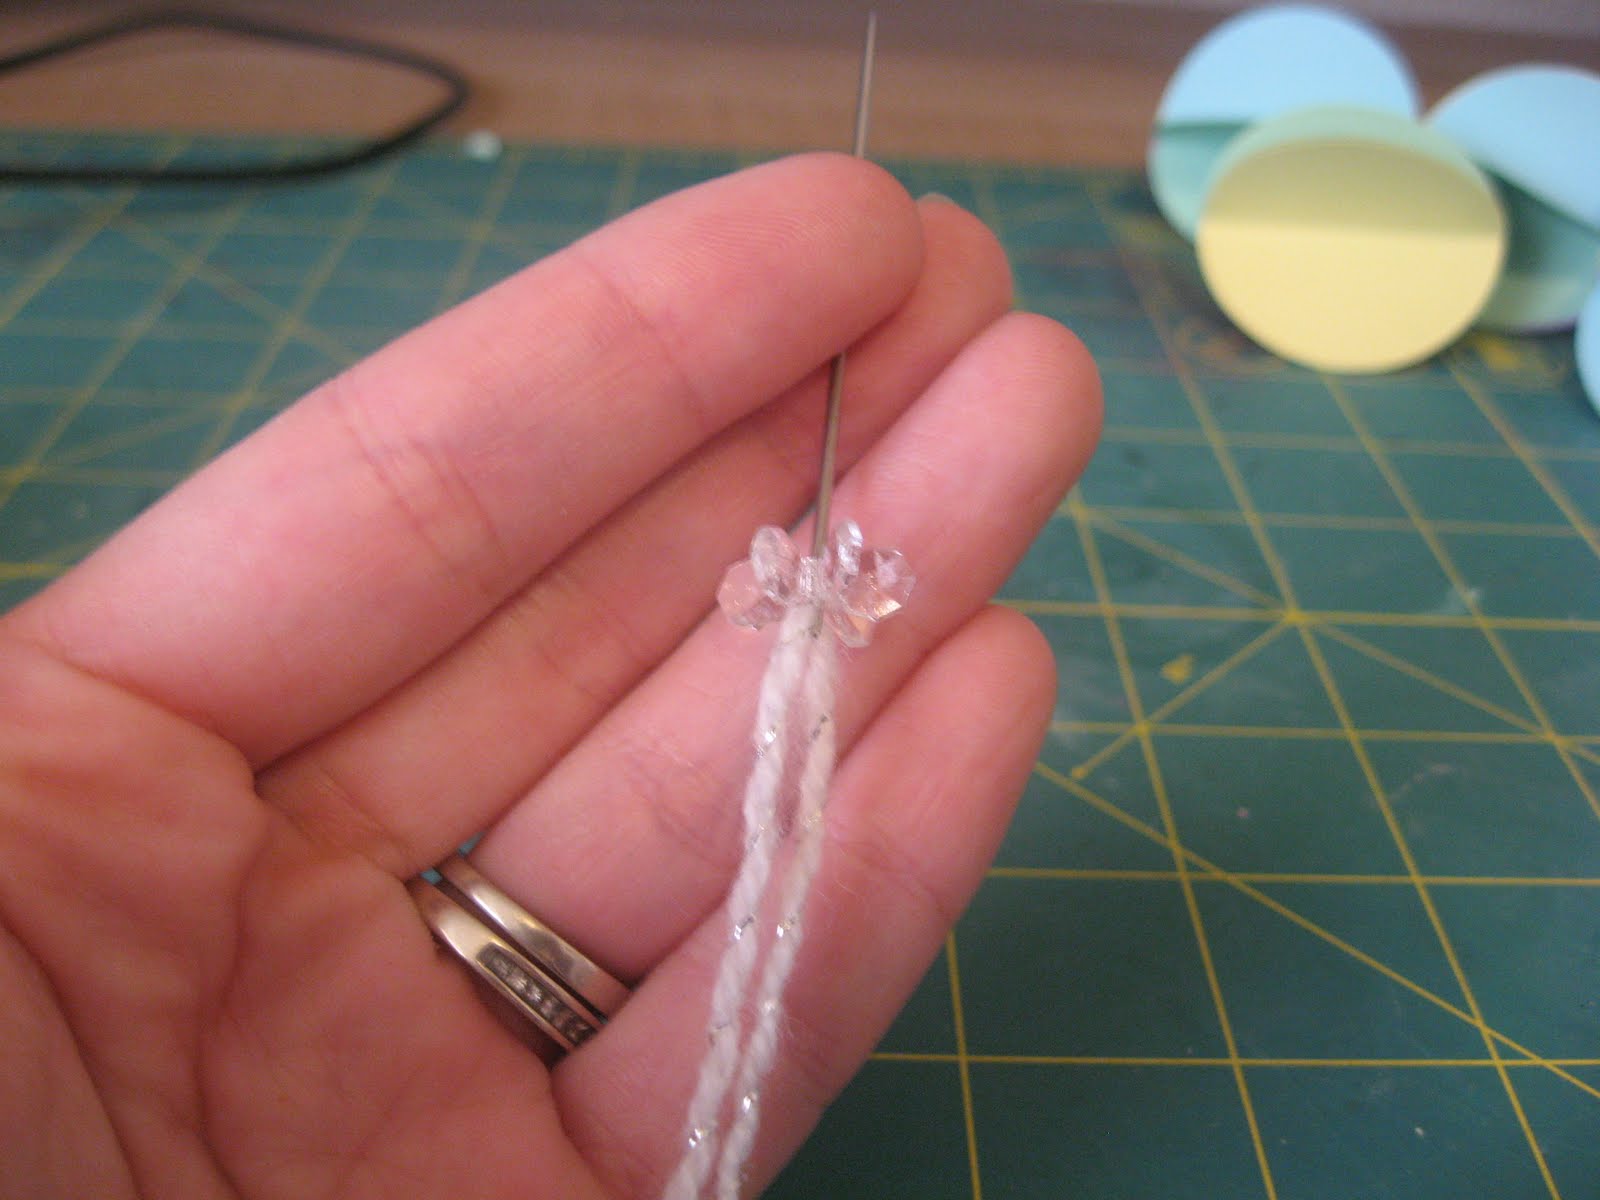

Then thread through the center of one of the balls.

Add another bead and glue in place making sure to secure the balls in place between the beads.

Thread another bead and repeat, but make sure there is space in-between (about 2 inches) from the last ball. Keep threading until all of the 12 balls and 24 beads are used. Take off the needle and make the same knot as the other end. What about the glitter glue you ask? Okay, okay, the glitter glue is used on the lines formed when you folded the circles.

You can use whatever color you want to; I prefer to use clear so that way I don’t have to switch a bunch of times, but it’s totally okay if you want to! Just apply the glitter glue (or use regular glue and sprinkle on glitter) to the creases on all the circles. Once the glitter glue is dry, you’re ready to hang! This could easily be tweaked to make a super cute mobile or as a couple hangings in your kids’ rooms/office, just adjust the length of the yarn.

Project Level: Easy-Peasy
Tuesday, May 31, 2011
Breaking the Stereo-Type: Deputy Daisy
I’d like you to meet someone very special. She’s incredibly loving, a great cuddler, extremely good with kids and babies, and loves cats.

This is Daisy, Our PITBULL.
Sadly, pitbulls have a bad reputation as monstrous beasts that attack everything that come into their path. Many counties are instituting a ban on this breed, and currently the town I live in is trying to pass it as well.
We got our bully (we named her Deputy Daisy) out in the “sticks” for $50. We met the momma, obviously full bred Pit, beautiful black brindle coloring. Her name was Princess. Sweet as could be! Out of 8 little pups, I chose Daisy because she was the reddest in color and the most affectionate. DH (then my boyfriend, now my husband) and I stopped by Wal-Mart on the way home with her to pick up some puppy chow. When we came back to the car… she had puked all over my backseat! Ugh! I spent the rest of the night cleaning out the backseat and picking ticks off her poor little body.
We already had two cats (Koda and Chili) at home and I wasn’t sure how well they would respond to each other. But everything was great! They played chase through the apartment and slept in close proximities to each other. She never snapped at them, and didn’t growl when they close to her bowl at dinnertime. A year later we got another kitten (Daytona) and they slept together in her cage (we were trying to kennel train her, and that just ended up being her "time out" spot)! Daytona was her best friend. We have since had to find homes for the cats because of the upkeep on them and because we kept moving around (I still miss them all the time though).
Here's Daisy and Koda. I always thought Daisy and Daytona were besties, but as I looked through the pictures in my computer, there are a TON of these two chillin' together.

Koda, Daytona, and Daisy watching the field mouse run around outside the door. Oh, yeah, add mouse-hunter to Daisy's resume too!

Chili and Daisy were napping on the bed together, but when I came back to snap a picture, Daisy woke up!

We have also added two little ones to Daisy’s family (our children), and she has always done extremely well with them. When I first became pregnant, I was a nanny to two wonderful little girls, and when I would pick them up from school I would always talk to the other moms. Quite a few of them gave me “Ooh, you have a pit? Better be careful she doesn’t attack your baby” shtick. It really was all I could do to keep my mouth shut and just nod my head at their complete and utter ignorance of the breed.
She took an unusual amount of punishment from my son when he was younger, but all she had to do to get him off was lick his face.


My daughter loves her so much! They are always cuddling and playing together.


Daisy is such a nurturing soul. She ran ahead of me to get to the baby who was crying, she plays on the floor with them, doesn’t snap, doesn’t snatch food out of their hands while they’re walking around the house, she’s an awesome dog.
The kids use her as a horse, a pillow, a chair, a best buddy. All of our friends love Daisy, and our parents (collectively) call her their “grandchild” because she really is one of the family. More people should be aware that the media frenzy surrounding pitbulls is wrong. It’s not “pitbull nature” to be vicious. It’s the people who raise them who decide whether or not the dog will be mean or friendly. My husband and I hold our heads high when we tell people we have a pitbull.

She may be a tad bit goofy, but she's ours <3
Sunday, May 29, 2011
Tutorial: Cigarette Box Up-Cycle
Smoking is, indeed, a nasty habit. With millions of people smoking millions of packs of cigarettes a day, there has GOT to be a ton of packs thrown out everyday, laying in the City Dump sluggishly decomposing. Want to make it a little bit greener?There is a way to make something useful from the empty boxes when you or someone you know is done with them. I’m pretty picky when I choose which box I’ll use to make these little cuties with. They can’t have any dents in them, or folds…I like them to be “just like new”.
*Editor's note: These boxes do not have to be used to keep cigarettes in! I use mine for keeping knick knacks, loose buttons, tiny notes, and miscellaneous little things in.

All you need:
Mod Podge
Cigarette box
Scissors
Scrapbook paper
2 buttons (works better if you use ones that have shanks on the back)
Hot glue
Embroidery floss
Craft knife
Foam brush or paint brush (not pictured)
Take off the clear plastic on the outside of the pack and the foil from the inside. Make sure your scrapbook paper is long enough to cover the entire box. The paper needs to be at least 4inches wide and 12 inches in height.
It’s important to the way the paper lays to start with the top flap of the pack! Make sure the paper hangs over a little so you can Mod Podge it under afterwards. Brush on the Mod Podge and center the flap on the scrapbook paper.Make sure to rub it down for maximum “stick-age” J


It’s important to the way the paper lays to start with the top flap of the pack! Make sure the paper hangs over a little so you can Mod Podge it under afterwards. Brush on the Mod Podge and center the flap on the scrapbook paper.Make sure to rub it down for maximum “stick-age” J


Apply Mod Podge to top and back of the pack next and press the paper over it. Make creases at the folds of the box and use the craft knife to make slits (or scissors).
Next, open the pack and make slits from the back where the paper creases. Now here comes the tricky part….Are you ready? Apply Mod Podge to the sides of the flaps and press this paper slat on it.

Apply more MP on top of the first layer of paper and press down the paper from the top of the flap. Apply more MP to that paper and press down the last bit of paper on top of that. It should look something like this now:

Break out your craft knife again! We have to get rid of the paper that’s hanging on the sides! Lay the pack on its side and cut first the corner at the top of the pack and then the paper at the diagonal.

Apply MP again to the inside of the top of the pack and press the paper to it.

MP the bottom and the front of the pack but just to the top of where the top flap will meet.

Make your creases again on the bottom and cut the slits.

Somewhere along the line I messed up and now it’s crooked, but that’s okay! Brush the Mod Podge onto the bottom flap and press paper onto box. MP the side of the pack (just to where the top will meet at the diagonal) and press the paper from the back onto it. Do you see where the point is on the side of the pack? Cut the paper on the front side at that height then fold down.

MP the sides again and press paper flaps to it. Now it should look something like this:

If you have paper hanging off the sides, just lay your box down and use your craft knife to clean it up. For this next part, you’ll have to just feel around to cut off the diagonal side so that way your box can close. Fold down the paper on the front of the box again so it just hits the top of where you stopped Mod Podging, and cut at the crease.

Now if you were straight with the placement of your box, the pattern on your paper will line up. Obviously mine didn’t!


After you've mastered your first one, make a whole lot more!

Happy Crafting!
Project Level: Moderately Intense
Subscribe to:
Posts (Atom)