Wow! Has it really been almost a month since my last post? I do apologize for my lack in posting, we are currently in the middle of moving.
I have been busy making things and planning out cool stuff to make, but the process of packing and cooking and cleaning and preparing for our move has sort of pushed writing on here back a few priority spots.
So hopefully after we have fully moved into our new house I will be able to write on here more! Hope you all are having a wonderful week!
Wednesday, June 29, 2011
Sunday, June 5, 2011
DIY Chalkboard "to-do" List
I am a list-maker.
I make tons of lists for tons of various things. But they're always on little scraps of paper that get lost. So all of the things that I plan on doing or making wind up not getting done. I'm seriously unorganized! So maybe having a jumbo chalkboard that won't get lost in the shuffle of my daily occurrences will help out a bit....That and dear old hubby can add stuff he wants me to do too.

What you need:
Cookie Sheet
Chalkboard contact paper
Krylon Clear Spray (Satin finish)
Acrylic paints (I used “Caribbean” and “White” from Apple Barrel) though if I had it, I would have used spray paint and primer instead.
Paintbrush (preferably foam, so you don’t get the loose hairs that I did- life lessons!)
Chipboard letters
Hot Glue Gun & Glue
Embellishments (not pictured)

I have had this project on my “to-do” list for a couple months now, but I kept putting it off. I started it by putting the contact paper on first, but now that I know better, I’d wait until AFTER the painting is done and clear coat has gone on before I added it. Oh, well.
Primer the back of the cookie sheet in white and let dry. Make sure to get all the cracks and crevices and around the edges!

While the white is drying, since I used already decorated chipboard letters (from K&Co), I painted over them (a few times) with the Caribbean blue. But if you’re using naked chipboard I doubt you’ll have to recoat as many times as I did.

After the white is completely dry on your sheet, start adding on the blue. I had to do 3 coats to get it how I wanted it.

Now, if you waited to add the contact paper until after the paint was on, you wouldn’t have to do this next step, but I didn’t so I’ll show you anyways!
Tape off the contact paper with tape and an old brown paper bag to make sure that when you spray the clear coat on, it won’t get on it.

Take the cookie sheet and the chipboard letters (I decided to use glitter glue to put stripes on them as an after-thought) outside and spray on your clear coat. Let it dry for 2 hours.
Now, for those of you who learned from my mistake, measure out your contact paper to cover the bottom, remove the paper backing and press onto the cookie sheet. Mine is 11 ½ x 15 ½ . Make sure to get out all the wrinkles and bubbles (obviously I didn’t too good of a job on that!)
Use your hot glue gun to add the letters to the cookie sheet. Then add whatever other embellishments you have to it too. I made a fabric flower (I found an awesome tutorial here) and a ribbon flower, and then sewed the two together with a button, then hot glued it onto the top corner.

Then I hot glued some white ribbon around the edges (mostly to cover up my mistakes and lack of being a straight cutter!) and then hot glued buttons to the corners because I just can't leave well enough alone. *Hot tip: when pressing buttons into hot glue, make sure your finger isn't covering the holes...

Hopefully your cookie sheet has a hole in the top so you can thread some ribbon or wire through to hang. Mine doesn’t, so I had to have my hubby drill one for me. I just tied a knot, making sure to leave enough ribbon so I could tie a bow on the top. Then twisted some heavy wire around it and made a loop to hang.


Finished product! And the cool thing is that since it's made of metal, I can make cute magnets to attach little pieces of paper!
Hope you had fun making this project! Did you do something different? I’d love to see it!
Project Level: Time Consuming, but fun!
Saturday, June 4, 2011
Fully-Loaded Fried Rice

Being half-Japanese, we grew up eating a lot of Japanese dishes. When my dad cooked them, he would add his own spin on them, especially the fried rice. He kind of just pulled whatever leftovers there were in the fridge and threw them in the pan :) So here is my version of fried rice:
Ingredients:
1 1/2 cups uncooked white rice
4 slices bacon
3 hot links
a handful of chopped vidalia onion
1 cup frozen veggie mix (carrots, corn, peas)
soy sauce (we use the Kikoman Light brand to cut down on the salt)
3 eggs
Items you'll need:
Pot for the rice
Wok (or a deep pan if you don't own a wok)
Wooden spatula
Knife for cutting
Kitchen scissors (not necessary, but I find it's easier to cut up the bacon with them)
Cutting board
Measuring cup
Prep:
Cut bacon into small slices.
Chop up about 1/4 of the onion into small pieces (or leave them bigger if you prefer).
Cut the hot links into bite size pieces.
Cook the rice according to directions in the pot. While the rice is cooking, add the bacon into a hot wok (set on medium high at first, then turned down to medium while its cooking). Keep it covered, or you'll get splashed (that's the only thing I don't like about bacon)!


After the bacon is pretty much crisp, add the frozen veggies and mix them in to coat them with the bacon grease.

Cook for about 5 minutes or until the vegetables are no longer frozen. next, add the cooked rice and mix everything well. Let the rice sit in the mix for about 4 minutes to soak up the bacon grease (its important for the taste).
Pour a little soy sauce over it. A little bit does go a long way, trust me! Let it cook with the soy sauce for about 2 minutes then make a "well" in the middle of your wok...this is where you'll crack your eggs into.


Linked up to: Today's Creative Blog
Wednesday, June 1, 2011
Spring Circle Garland
A year ago I made a bunch of party decorations for a wonderful friend of mine. One of my favorite things had to have been the garlands. They were really easy to make and turned out super cute!

Things you need:
Colored cardstock (4 colors)
Circle cutter (I use my Martha Stewart one)
24 Star beads
yarn (a healthy length!)
Glue
Glitter glue (or just glitter)
Long needle
Cutting mat (mine is atrociously dirty, someday I’ll get around to cleaning it off a bit)

Using your circle cutter, cut out about 12- 2 ½ inch circles per color of cardstock.

Fold each circle in half.

Then glue four circles together, but try to avoid gluing in the center as much as possible because you’ll need your needle to slide through easily.

Do this until you have used all of your circles. You can do one, two, or four different colors per “ball” that you make. Mix it up and have fun! Once the glue is dry, thread your needle with the ribbon. Make a knot at one end (either a complete knot, or one with a loop on it if you will be hanging it from a nail or thumbtack) Thread one of the star beads and glue in place.
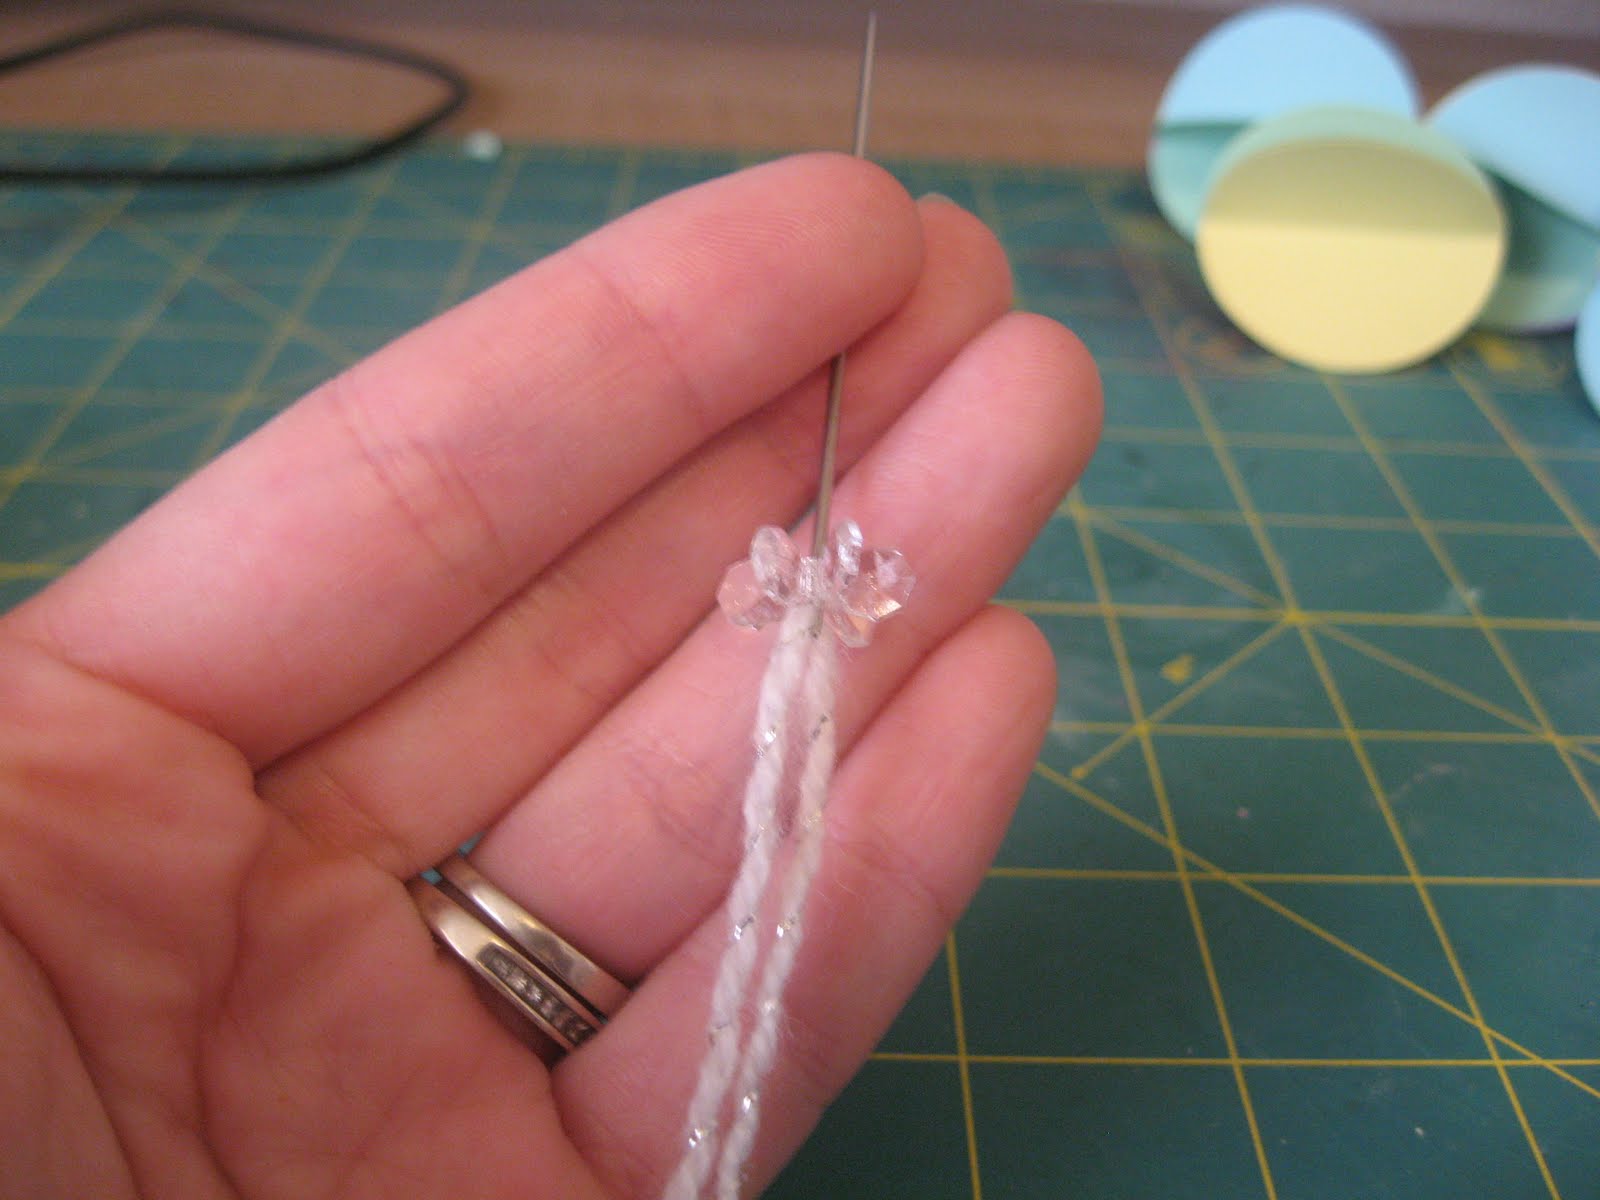

Then thread through the center of one of the balls.

Add another bead and glue in place making sure to secure the balls in place between the beads.

Thread another bead and repeat, but make sure there is space in-between (about 2 inches) from the last ball. Keep threading until all of the 12 balls and 24 beads are used. Take off the needle and make the same knot as the other end. What about the glitter glue you ask? Okay, okay, the glitter glue is used on the lines formed when you folded the circles.

You can use whatever color you want to; I prefer to use clear so that way I don’t have to switch a bunch of times, but it’s totally okay if you want to! Just apply the glitter glue (or use regular glue and sprinkle on glitter) to the creases on all the circles. Once the glitter glue is dry, you’re ready to hang! This could easily be tweaked to make a super cute mobile or as a couple hangings in your kids’ rooms/office, just adjust the length of the yarn.

Project Level: Easy-Peasy
Subscribe to:
Posts (Atom)