I am a list-maker.
I make tons of lists for tons of various things. But they're always on little scraps of paper that get lost. So all of the things that I plan on doing or making wind up not getting done. I'm seriously unorganized! So maybe having a jumbo chalkboard that won't get lost in the shuffle of my daily occurrences will help out a bit....That and dear old hubby can add stuff he wants me to do too.
What you need:
Cookie Sheet
Chalkboard contact paper
Krylon Clear Spray (Satin finish)
Acrylic paints (I used “Caribbean” and “White” from Apple Barrel) though if I had it, I would have used spray paint and primer instead.
Paintbrush (preferably foam, so you don’t get the loose hairs that I did- life lessons!)
Chipboard letters
Hot Glue Gun & Glue
Embellishments (not pictured)
I have had this project on my “to-do” list for a couple months now, but I kept putting it off. I started it by putting the contact paper on first, but now that I know better, I’d wait until AFTER the painting is done and clear coat has gone on before I added it. Oh, well.
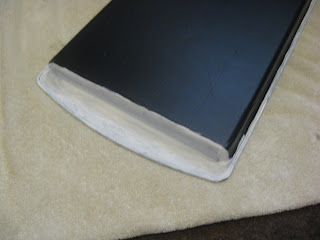
Primer the back of the cookie sheet in white and let dry. Make sure to get all the cracks and crevices and around the edges!
While the white is drying, since I used already decorated chipboard letters (from K&Co), I painted over them (a few times) with the Caribbean blue. But if you’re using naked chipboard I doubt you’ll have to recoat as many times as I did.
After the white is completely dry on your sheet, start adding on the blue. I had to do 3 coats to get it how I wanted it.
Now, if you waited to add the contact paper until after the paint was on, you wouldn’t have to do this next step, but I didn’t so I’ll show you anyways!
Tape off the contact paper with tape and an old brown paper bag to make sure that when you spray the clear coat on, it won’t get on it.
Take the cookie sheet and the chipboard letters (I decided to use glitter glue to put stripes on them as an after-thought) outside and spray on your clear coat. Let it dry for 2 hours.
Now, for those of you who learned from my mistake, measure out your contact paper to cover the bottom, remove the paper backing and press onto the cookie sheet. Mine is 11 ½ x 15 ½ . Make sure to get out all the wrinkles and bubbles (obviously I didn’t too good of a job on that!)
Use your hot glue gun to add the letters to the cookie sheet. Then add whatever other embellishments you have to it too. I made a fabric flower (I found an awesome tutorial here) and a ribbon flower, and then sewed the two together with a button, then hot glued it onto the top corner.
Then I hot glued some white ribbon around the edges (mostly to cover up my mistakes and lack of being a straight cutter!) and then hot glued buttons to the corners because I just can't leave well enough alone. *Hot tip: when pressing buttons into hot glue, make sure your finger isn't covering the holes...
Hopefully your cookie sheet has a hole in the top so you can thread some ribbon or wire through to hang. Mine doesn’t, so I had to have my hubby drill one for me. I just tied a knot, making sure to leave enough ribbon so I could tie a bow on the top. Then twisted some heavy wire around it and made a loop to hang.
Finished product! And the cool thing is that since it's made of metal, I can make cute magnets to attach little pieces of paper!
Hope you had fun making this project! Did you do something different? I’d love to see it!
Project Level: Time Consuming, but fun!


That really neat Nichole.
ReplyDelete