Showing posts with label Tutorial. Show all posts

Wednesday, October 19, 2011

Color Plaques

I've been working with Monkey#1 on colors lately, so I've been trying to group his toys together to show him the various ranges that a color can have. However, I wanted him to be able to see how the color is spelled as well.

Since the monkeys' bedroom walls are pretty much barren, I wanted to make something to hang. I made a trip to the 99Cents Only store and picked up a few wall plaques:


I spray painted the plaques white. Project mistake #1: I laid a damp washrag over one of the plaques to try to take off the picture. BAD, very BAD people! These plaques are made of that cheap particle board, so all it did was make it look disgusting.
 Project mistake #2: I didn't use a primer first, so I ended up doing like 5 coats of spray paint. HUGE waste, I know (insert major frowny face here)...


Once they were (Finally!!) coated and dry, I hot glued old toys, buttons, flowers, really whatever I could find to go on the plaques, one color scheme per plaque. I had to make sure I left enough space open on the plaque for the color to be painted on.


Then I took out my stash of acrylics to paint the names of the colors and the sides of the plaques. Which brings us to Project mistake #3: I should have used stencils to write out the color words!


Yes, I know the words look all funky...apparently my skills in painting are limited, and do not include painting words free-hand. Oh well, think my kids will still like them?

Here they are all hung on the wall.


Since I made them and hung them on the wall, I've moved them to a better space and arrangement in their room. Monkey#1 has his colors down pat, still working with Monkey#2 but she still has plenty of time :)


Linking up to : WhipperBerry


Friday, August 26, 2011

DIY Train Table

Monkey #1 is super into trains right now, but I just can't fork over the $100 for a train table that I know I could make for WAY less. I tried looking on Craigslist to see if someone had one I liked for free or super cheap, but they all had glass components. So I asked my friends on Facebook if anyone had an old coffee table (no glass) they no longer wanted. My friend Britt had the exact kind I was looking for! Hers was just sitting in their garage collecting dust and said I could come pick it up. Gosh I love that girl!

Here it is in all it's glory:


No glass, storage underneath! One leg needs to be fixed, but otherwise completely useful!

I went to Wal-Mart and picked up some green fabric that looked a little like foliage/flowers. I bought 2 yards, but only needed about 1 1/2. I started in one corner of the table and began hot gluing it down.
 I glued the underside of the lip, and used an old pencil to push the fabric into the glue.
After the whole table was covered and glued (cutting off the excess fabric), I took an X-Acto knife around and cut/tore off the uneven parts.


All covered:
Then I broke out my black acrylic paint. I know this is supposed to be his train table, but why not let it do double duty as a race track/road? So I painted a road around the sides.
 *Yes, I was doing this at about 6:30 in the morning so my coffee was ever present in this task.
Then I added the yellow painted lines for lanes.
I know, it looks a little messy, but I did go back and fix the smudgy areas.


Here it is all set up:

I couldn't wait to show it to him, so a little bit after he woke up I brought him outside (don't mind his messy hair, lol). But he wanted to play with his cars on it first.
Lightning McQueen takes off!

There was a convoy...
All the cars crashed into a pile and Lightning McQueen was the only who survived.
He loves playing on the table so much! And Monkey #2 just loves to dance on it.

Total cost of this project: $4.

Wedding Cake Topper!

When my husband and I got married, we decided to for-go the traditional wedding cake topper of the bride and groom and went with monograms instead.


The monograms were too pretty to just throw away, but because of the spikes on the ends of them, we really couldn't just display them any old way. So they were put in a box. For 5 years! And now that the hectic chaos of moving is over, I found them and decided now was the time to do something with them.

I started off by sawing the pokers off the tips of the letters


I had to take sandpaper to the edges because the saw left a bit of a ridge on the bottom


I Google searched the silhouette of a heart, printed out the one I liked and then cut it out to use as a stencil. I used Watercolor paper to glue everything down on because A.) It is really sturdy paper and B.) because it is the only paper I had that was long enough to fit inside my 11x14 frame!


I grabbed out my Box O' Buttons and used my entire arsenal of red buttons to make the heart! Seriously, I have maybe 2 red buttons left after this project.... I had to arrange them on the heart shape first to make sure I got the placement right, then used my glue gun to stick them to the paper.


I should have remembered how painful it was to use hot glue and buttons from this project. But I didn't. So I had hot glue burning my fingertips with each and every button I pushed down, seeping up through the holes. *wince*  And then glue buttons on top of the others to fill in any big white gaps.
You should probably remember to erase your pencil lines before gluing the buttons down (in sections) or else you'll have to peel them off and then re-glue them like I did!

I had to figure out exactly how I wanted the monograms to be placed and then hot glued those onto the paper as well.

After all that, I just stuck it in the frame and hung it on our bedroom wall.


I absolutely LOVE the way it turned out. Maybe some day I'll take it back out and write our wedding date on the bottom right corner, but for now it shall stay the way it is.

 *And the TV reflection you see in the frame...It's Ni-Hao Kai Lan tickling the sun awake*

Project Level: Easy-Peasy

Sunday, June 5, 2011

DIY Chalkboard "to-do" List

I am a list-maker.

 I make tons of lists for tons of various things. But they're always on little scraps of paper that get lost. So all of the things that I plan on doing or making wind up not getting done. I'm seriously unorganized! So maybe having a jumbo chalkboard that won't get lost in the shuffle of my daily occurrences will help out a bit....That and dear old hubby can add stuff he wants me to do too.


What you need:
Cookie Sheet
Chalkboard contact paper
Krylon Clear Spray (Satin finish)
Acrylic paints (I used “Caribbean” and “White” from Apple Barrel) though if I had it, I would have used spray paint and primer instead.
Paintbrush (preferably foam, so you don’t get the loose hairs that I did- life lessons!)
Chipboard letters
Hot Glue Gun & Glue
Embellishments (not pictured)


I have had this project on my “to-do” list for a couple months now, but I kept putting it off. I started it by putting the contact paper on first, but now that I know better, I’d wait until AFTER the painting is done and clear coat has gone on before I added it. Oh, well.

Primer the back of the cookie sheet in white and let dry. Make sure to get all the cracks and crevices and around the edges!


While the white is drying, since I used already decorated chipboard letters (from K&Co), I painted over them (a few times) with the Caribbean blue. But if you’re using naked chipboard I doubt you’ll have to recoat as many times as I did.


After the white is completely dry on your sheet, start adding on the blue. I had to do 3 coats to get it how I wanted it.


Now, if you waited to add the contact paper until after the paint was on, you wouldn’t have to do this next step, but I didn’t so I’ll show you anyways!
Tape off the contact paper with tape and an old brown paper bag to make sure that when you spray the clear coat on, it won’t get on it.


Take the cookie sheet and the chipboard letters (I decided to use glitter glue to put stripes on them as an after-thought) outside and spray on your clear coat. Let it dry for 2 hours.

Now, for those of you who learned from my mistake, measure out your contact paper to cover the bottom, remove the paper backing and press onto the cookie sheet.  Mine is 11 ½ x 15 ½ . Make sure to get out all the wrinkles and bubbles (obviously I didn’t too good of a job on that!)

Use your hot glue gun to add the letters to the cookie sheet. Then add whatever other embellishments you have to it too. I made a fabric flower (I found an awesome tutorial here) and a ribbon flower, and then sewed the two together with a button, then hot glued it onto the top corner.


 Then I hot glued some white ribbon around the edges (mostly to cover up my mistakes and lack of being a straight cutter!) and then hot glued buttons to the corners because I just can't leave well enough alone. *Hot tip: when pressing buttons into hot glue, make sure your finger isn't covering the holes...


Hopefully your cookie sheet has a hole in the top so you can thread some ribbon or wire through to hang. Mine doesn’t, so I had to have my hubby drill one for me. I just tied a knot, making sure to leave enough ribbon so I could tie a bow on the top. Then twisted some heavy wire around it and made a loop to hang.


Finished product! And the cool thing is that since it's made of metal, I can make cute magnets to attach little pieces of paper!

Hope you had fun making this project! Did you do something different? I’d love to see it!

Project Level: Time Consuming, but fun!

Wednesday, June 1, 2011

Spring Circle Garland

A year ago I made a bunch of party decorations for a wonderful friend of mine. One of my favorite things had to have been the garlands. They were really easy to make and turned out super cute!


Things you need:
Colored cardstock (4 colors)
Circle cutter (I use my Martha Stewart one) 
24 Star beads
yarn (a healthy length!)
Glue
Glitter glue (or just glitter)
Long needle
Cutting mat (mine is atrociously dirty, someday I’ll get around to cleaning it off a bit)


Using your circle cutter, cut out about 12- 2 ½ inch circles per color of cardstock.


 Fold each circle in half.


Then glue four circles together, but try to avoid gluing in the center as much as possible because you’ll need your needle to slide through easily.


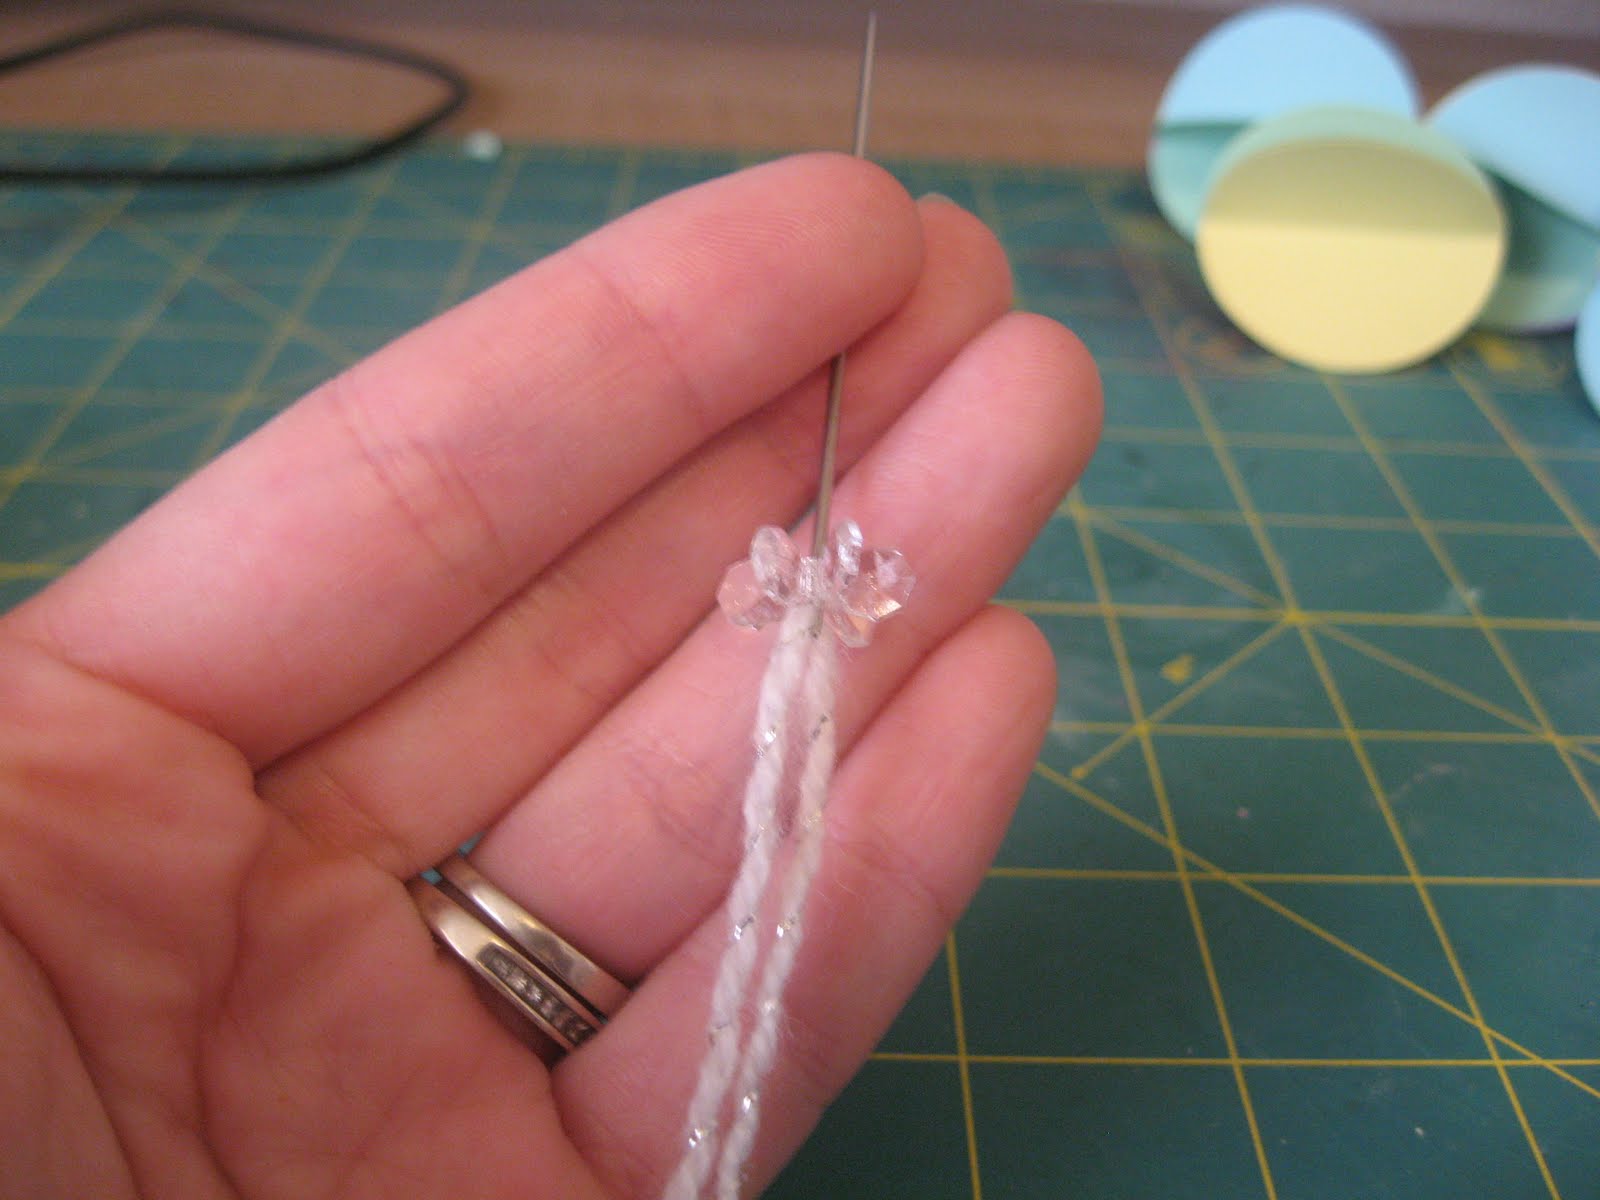
Do this until you have used all of your circles. You can do one, two, or four different colors per “ball” that you make. Mix it up and have fun! Once the glue is dry, thread your needle with the ribbon. Make a knot at one end (either a complete knot, or one with a loop on it if you will be hanging it from a nail or thumbtack) Thread one of the star beads and glue in place.


 Then thread through the center of one of the balls.


 Add another bead and glue in place making sure to secure the balls in place between the beads.


Thread another bead and repeat, but make sure there is space in-between (about 2 inches) from the last ball. Keep threading until all of the 12 balls and 24 beads are used. Take off the needle and make the same knot as the other end.  What about the glitter glue you ask? Okay, okay, the glitter glue is used on the lines formed when you folded the circles.


 You can use whatever color you want to; I prefer to use clear so that way I don’t have to switch a bunch of times, but it’s totally okay if you want to! Just apply the glitter glue (or use regular glue and sprinkle on glitter) to the creases on all the circles. Once the glitter glue is dry, you’re ready to hang! This could easily be tweaked to make a super cute mobile or as a couple hangings in your kids’ rooms/office, just adjust the length of the yarn.


Project Level: Easy-Peasy

Sunday, May 29, 2011

Tutorial: Cigarette Box Up-Cycle

Smoking is, indeed, a nasty habit.  With millions of people smoking millions of packs of cigarettes a day, there has GOT to be a ton of packs thrown out everyday, laying in the City Dump sluggishly decomposing. Want to make it a little bit greener?There is a way to make something useful from the empty boxes when you or someone you know is done with them. I’m pretty picky when I choose which box I’ll use to make these little cuties with. They can’t have any dents in them, or folds…I like them to be “just like new”.

*Editor's note: These boxes do not have to be used to keep cigarettes in! I use mine for keeping knick knacks, loose buttons, tiny notes, and miscellaneous little things in.

All you need:
Mod Podge
Cigarette box
Scissors
Scrapbook paper
2 buttons (works better if you use ones that have shanks on the back)
Hot glue
Embroidery floss
Craft knife
Foam brush or paint brush (not pictured)

Take off the clear plastic on the outside of the pack and the foil from the inside. Make sure your scrapbook paper is long enough to cover the entire box. The paper needs to be at least 4inches wide and 12 inches in height.

  It’s important to the way the paper lays to start with the top flap of the pack! Make sure the paper hangs over a little so you can Mod Podge it under afterwards. Brush on the Mod Podge and center the flap on the scrapbook paper.Make sure to rub it down for maximum “stick-age” J


Apply Mod Podge to top and back of the pack next and press the paper over it. Make creases at the folds of the box and use the craft knife to make slits (or scissors).
Next, open the pack and make slits from the back where the paper creases.  Now here comes the tricky part….Are you ready? Apply Mod Podge to the sides of the flaps and press this paper slat on it.


 Apply more MP on top of the first layer of paper and press down the paper from the top of the flap. Apply more MP to that paper and press down the last bit of paper on top of that. It should look something like this now:


 Break out your craft knife again! We have to get rid of the paper that’s hanging on the sides! Lay the pack on its side and cut first the corner at the top of the pack and then the paper at the diagonal.

Apply MP again to the inside of the top of the pack and press the paper to it.


 MP the bottom and the front of the pack but just to the top of where the top flap will meet.


 Make your creases again on the bottom and cut the slits.

 Somewhere along the line I messed up and now it’s crooked, but that’s okay! Brush the Mod Podge onto the bottom flap and press paper onto box. MP the side of the pack (just to where the top will meet at the diagonal) and press the paper from the back onto it. Do you see where the point is on the side of the pack? Cut the paper on the front side at that height then fold down.


 MP the sides again and press paper flaps to it. Now it should look something like this:

If you have paper hanging off the sides, just lay your box down and use your craft knife to clean it up. For this next part, you’ll have to just feel around to cut off the diagonal side so that way your box can close. Fold down the paper on the front of the box again so it just hits the top of where you stopped Mod Podging, and cut at the crease.


 Now if you were straight with the placement of your box, the pattern on your paper will line up. Obviously mine didn’t!


You can now either Mod Podge the outside of your box or leave as is…I like to make it shiny, so I MP it, then let it dry. Get your glue gun ready folks! Cut off a piece of embroidery floss, about 8 inches. Apply a little glob of hot glue on the top flap of the box. Place the floss on top and then press into it with one of your buttons.


 Attach the other button directly below onto the front side of the box. Let the glue dry! Then you can wrap your floss around the buttons to close the box.

After you've mastered your first one, make a whole lot more!


Happy Crafting!

Project Level: Moderately Intense